
Manage Students
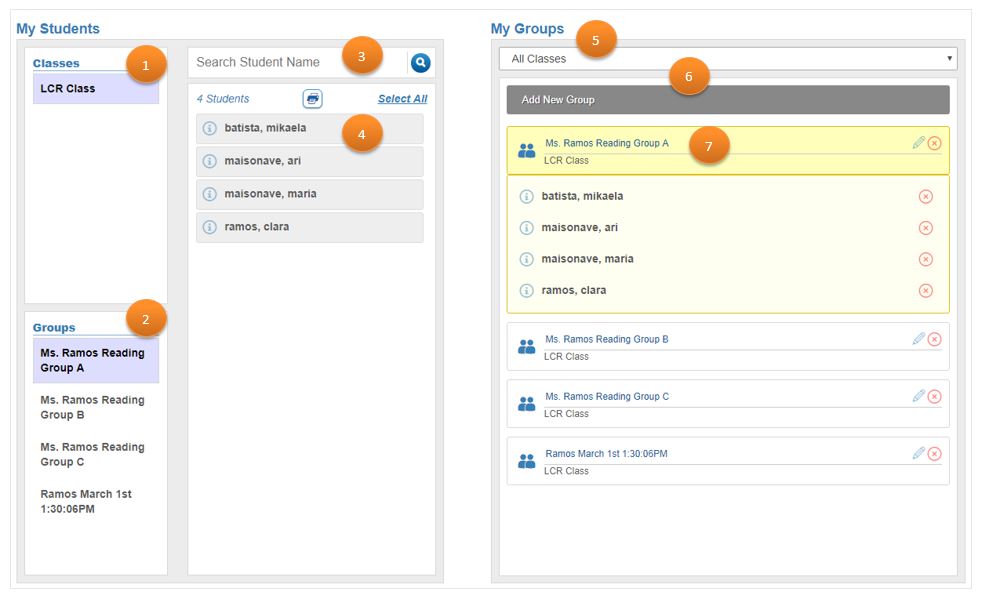
Manage Students is used to create whole and small groups in order to target assignments to students with precision. You can view your student population by class or group. In addition, you can search for students, select all, and drag drop student names to add new groups from a class or other groups. Editing groups, deleting groups or students from a group is easy with the Pencil and Delete Group or Student icons. In addition, groups created in Manage Students are also used to tailor and customize lessons in ePlanner for small group configurations.

|
ePlanner is a planning tool that requires a subscription. Your district or school may or may not have a subscription. Contact your technical administrator if you do not see any classes when you open the Manage Students page. Classes must be set up by your technical administrator before you can create groups. |
Manage Students at a Glance
Class Roster and Student/Group Information at a Glance
| Manage Students Legend | Description |
|---|---|
|
View classes and select to view students in a class. |
|
View groups and select to view students in a group. Note: You can select multiple classes and groups to view students. |
|
Use to search by student name and clear search criteria. |
|
|
|
Select a class to add new groups. |
|
Use to add new groups. |
|
|
|
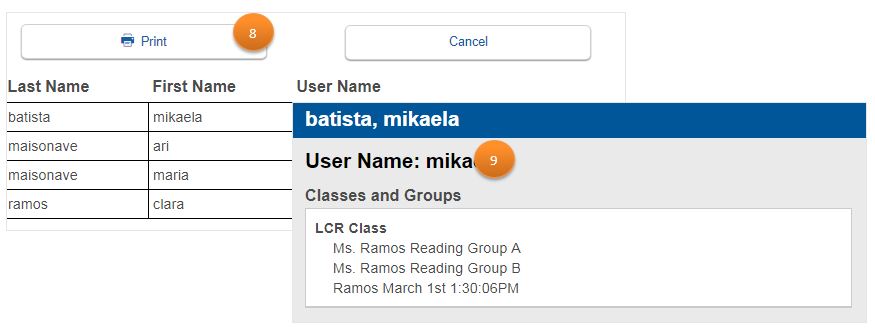
Print a class roster that shows student's first name, last name, and user name. |
|
View student details like student name, user name, classes and groups the student belongs to. |
Last Updated: December 20, 2019